¶ Overview
The P1 cookie is a small device through which you can connect Fluvius digital meters to the COFY-box. This allows you to view your instantaneous energy consumption (and more) in real-time (the website of Fluvius only updates once a day). The COFY-box also uses this data to perform local optimisations (e.g. scheduling your heat pump).
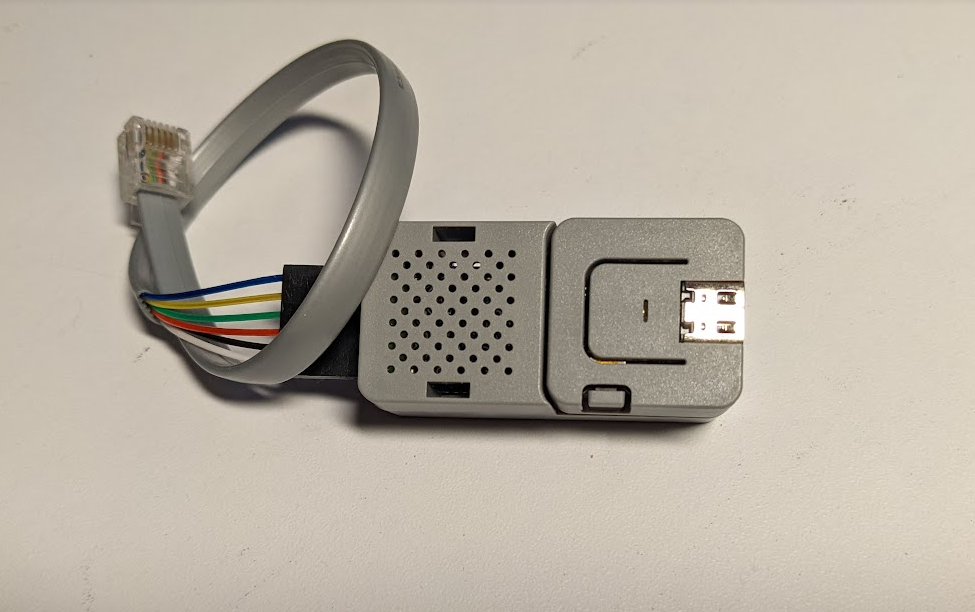
Installing a P1-cookie consists of a few steps:
- Opening the P1-port on your digital meter
- Attaching the P1-cookie to the P1-port
- Connecting the cookie to your COFY-box
Appendix:
- P1-cookie LED indications
¶ 1. Opening the P1-port on your digital meter.
The P1-port is not enabled by default*. You will have to unlock it on your DSO's portal.
*At the time of writing, we don't yet know the procedure for other regions (Netherlands, Brussels, Wallonia (Ores), Wallonia (Resa), France). If you do, please let us know.
Note for installers: This action should be taken some time before you visit the installation site, as it might take some time for the activation of the P1-port to take effect.
¶ Fluvius (Flanders, BE)
- Login to your Fluvius portal via mijn.fluvius.be.
- Go to port management
(poortbeheer). - Click
Poortbeheer aanvragen. - Select the electricity meter that you wish to unlock. If your electricity meter is not yet in the list, you can add it here*.
- Click
Ga verder. - Confirm your request and click
Aanvraag bevestigen*.
*This may trigger a verification step by Fluvius. If your e-mail address is known by your energy supplier (and shared with Fluvius), you will receive a verification e-mail. If no e-mail address is know, you will receive a physical letter in the mail.
- Check your mailbox (e-mail or physical), and follow the instructions.
- Return to
Poortbeheer. You should now see a toggle that allows you to open or close the P1-port. Click the toggle, and change the status toOpen. - Wait until the text changes from
Poort openen...toPoort open. This may take some time.
Once the P1-port has been opened, which can take up to a day or more, the P1-cookie can be connected.
¶ 2. Attaching the P1-cookie to the P1-port
The P1 cookie comes bundled with a cable. Insert the black end of the cable into the cookie, ensuring the blue cable is at the right side of the cookie when viewed from above.
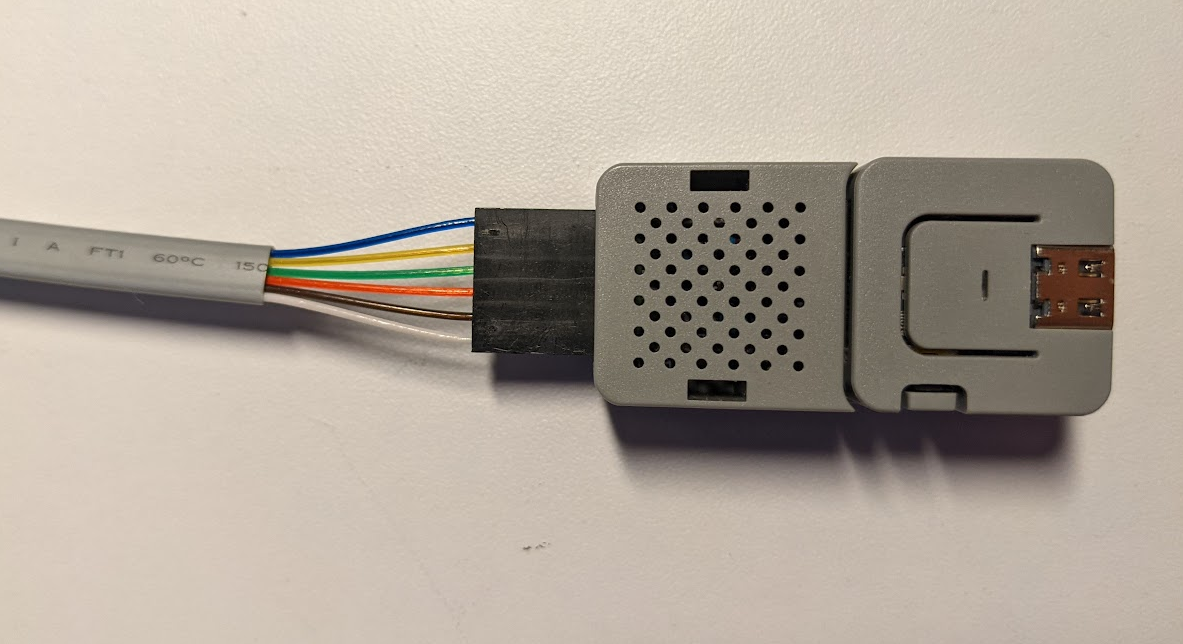
Incorrectly connecting the cable does not damage the cookie, but prevents it from functioning correctly.
The USB-C port of the cookie is only used for debugging. Never plug in this USB port while the cookie is connected to the digital meter!
Open the yellow cover in the lower left corner of the digital meter. Plug the other end of the cable into the P1 port on the right.
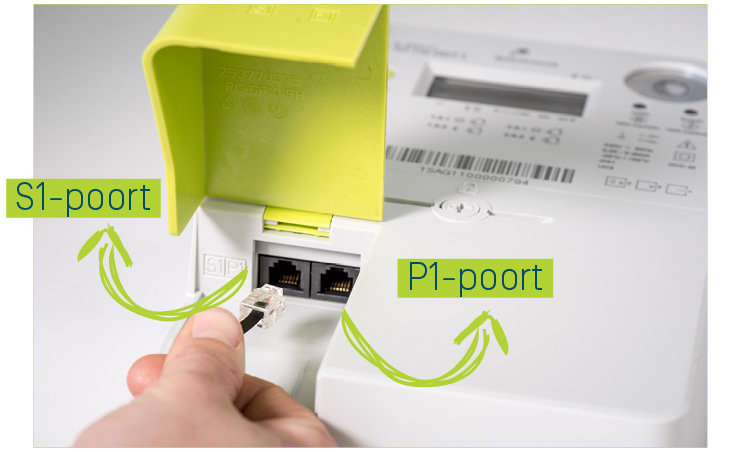
The left port is the S1 port and is not used by the cookie.
The cookie is now connected to the meter and is starting up. The LED should go from red to green.
¶ 3. Connecting the cookie to your COFY-box
The cookie must now be connected to the wifi hotspot of your COFY-box. To do this, make sure you have the wifi password of your COFY-box with you (it is printed on the backside of the COFY-box).
Use a smartphone, tablet or laptop and scan for wifi networks. You should see a network named COFY, followed by a bunch of letters and number, e.g. COFY33DC. Connect to this network.
You might receive an error that this network has no internect connectivity, make sure your device still connects to this network.
After connecting, a webpage should open automatically. If this is not the case, open a browser and surf to http://192.168.4.1. This webpage allows you to view the real-time data from your Fluvius digital meter, as well as configure the settings of the cookie.
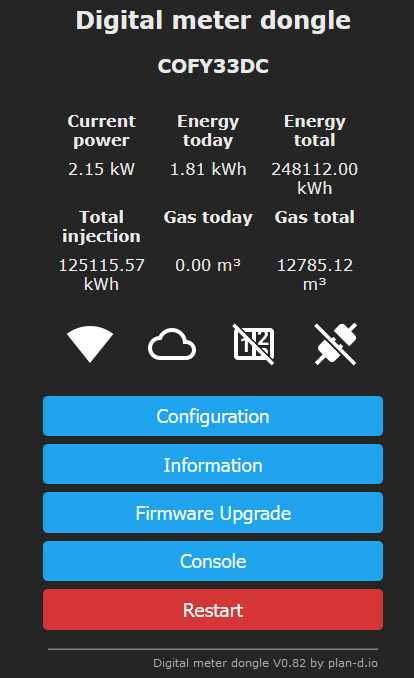
Click on Configure. On the next page, click on Configure wifi.
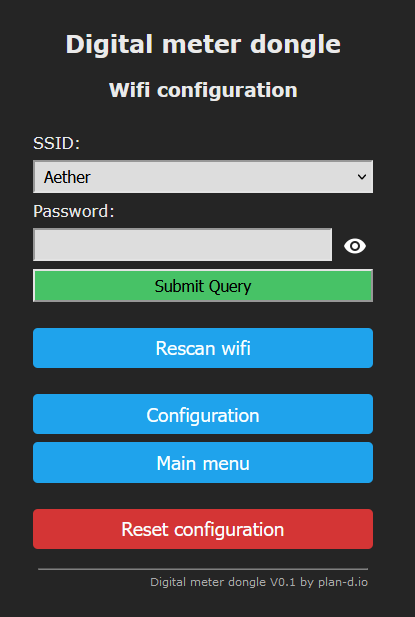
Select the COFY-box wifi from the SSID dropdown list, fill in the wifi password at Password and click Submit query. A green text should appear indicating the settings have been saved. Return to the previous menu by clicking on Configuration.
OPTIONAL: You can check if the COFY-box settings are correct by clicking on Configure cloud.
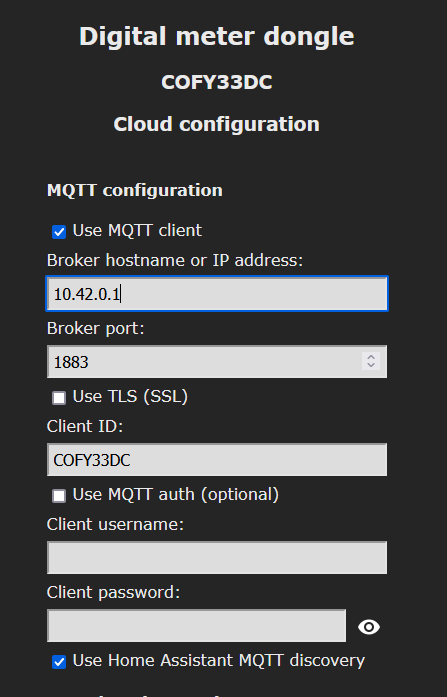
The default settings are:
Use MQTT client: checkedBroker hostname: 10.42.0.1Broker port: 1833Client ID: the name of the P1 cookie (prefilled, same as the wifi name)Client username: can be left blankClient password: can be left blankUse Home Assistant MQTT discovery: checked
Click on Submit query if you changed anything, and then on Configuration to return to the previous menu.
Click on Main menu. You have now returned to the start page.
The cookie needs to be rebooted for the changes to take effect. Click on the red Restart button and confirm. The cookie will now reboot. You can close the browser and connect back to your normal wifi network.
If the cookie has succesfully connected to the COFY-box wifi, the LED should become blue. If it is green, an error has occured (e.g. you mistyped the wifi password). Repeat the procedure in this paragraph.