¶ Commissioning Shelly Devices
This will lead you through the process of configuring your Shelly device so that the relay and the power feeds are visible in Home Assistant.
¶ Connecting to the Shelly Dashboard
- On the computer/phone look for WiFi network with SSID like ‘shellyem-XXXX’.
- Connect to this network (no password should be required).
- Navigate to
192.168.33.1in a web browser. - You should see the below screen or similar (it may vary based on firmware version)
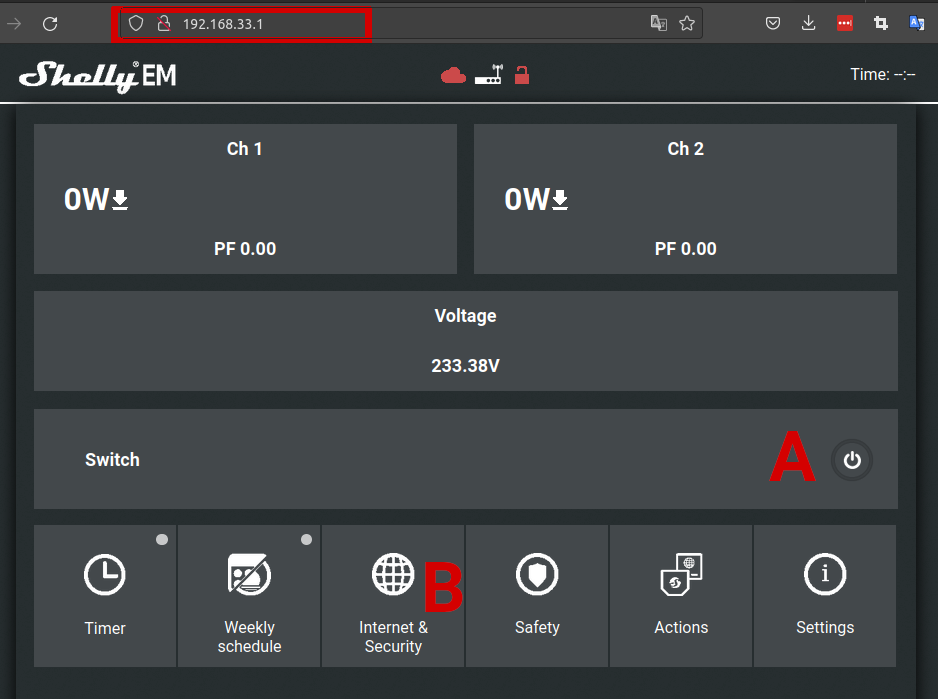
- Verify that when you click the switch power icon (indicated with a red A) the relay activates by listening for an audible clunk from the relay.
- Next, connect the Shelly to the Cofybox WiFi network. Select the 'Internet & Security' tab (indicated with a red B in the above screenshot)
- Select the ‘WIFI MODE - CLIENT’ drop down. Complete the details for the Cofybox WiFi network (from the sticker on your box) in the fields highlighted in red below and click SAVE. It is worth ‘revealing’ the password using the eye symbol as a check to verify you have entered it correctly before hitting SAVE
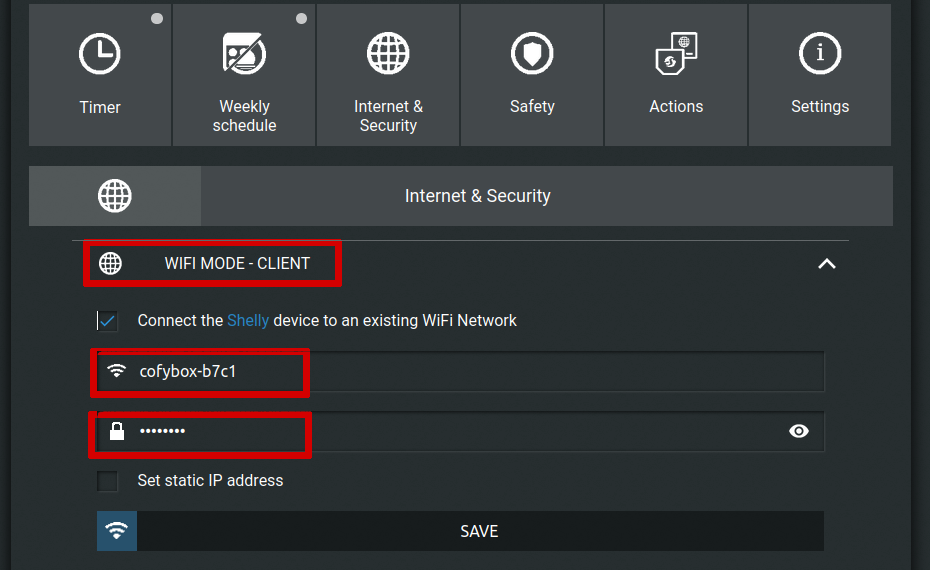
- Once you've pressed SAVE you should see a pop-up (below) confirming the network you are connecting the device to. To access the Shelly on it's new network you'll need to now connect your laptop/phone to the Cofybox WiFi network to continue.

¶ Finding the IP address of the Shelly on the Cofybox network
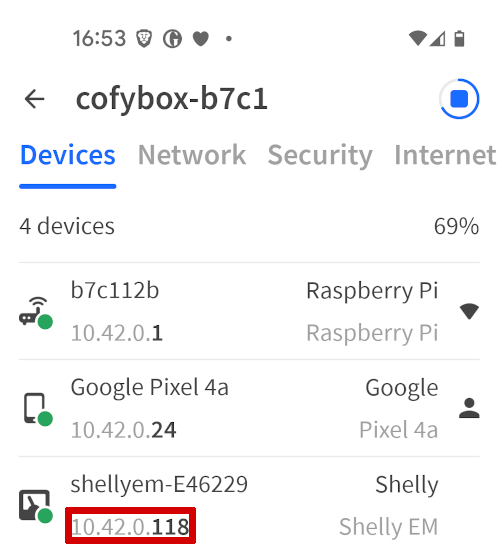
- We recommend for most people a free phone (Android/iOS) app & desktop (Win/Mac) application called ‘Fing’.
- Once connected to the cofybox-xxxx WiFi network, open Fing and press the ‘Scan for devices’ button.
- Your Shelly should be shown in the list of devices (as in the image right) - with the IP address underneath in this case
10.42.0.118 - Enter this address in your web browser to get back to the Shelly dashboard and continue with the setup.
¶ Update Firmware on Controller
- Ensure that your Cofybox is connected to the internet via an ethernet cable - internet traffic is routed to the Shelly in order for it to check for updates.
- The Shelly should at this stage have acquired the time automatically through the network and you can verify this by looking in the top-right corner where the current time is displayed. If it is not shown then the Shelly is having an issue acquiring the network time.
- Go to the ‘Settings' tab (on the far right of the Shelly dashboard) and select the ‘FIRMWARE UPDATE’ drop-down. If an update is showing as available select ‘UPGRADE FIRMWARE’, the process should take less than 2 minutes to complete.
¶ Connect Controller to MQTT Broker
- Using the IP determined in the previous step you should now access the Shelly dashboard again (note that in completing this step you are verifying connectivity of the ShellyEM to the secure network).
- Click ‘Internet & Security’ > ‘Advanced - Developer Settings’
- Enable the MQTT mode by ticking the ‘Enable action execution via MQTT’.
- In the ‘Server’ field enter
10.42.0.1:1883. The remaining fields should be left blank.
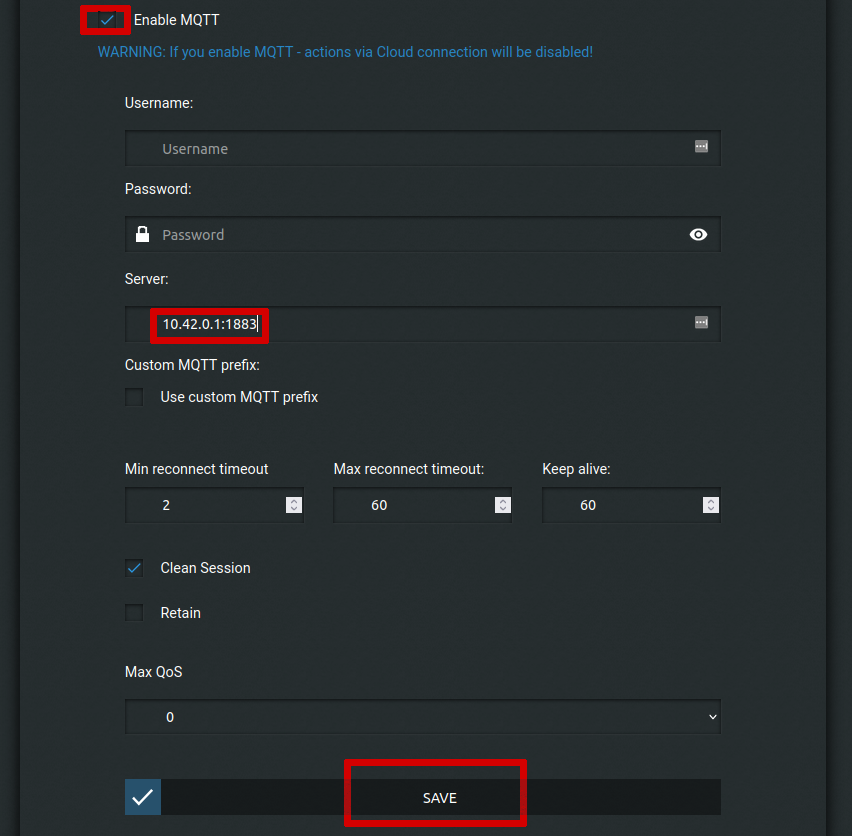
- After saving the Shelly must restart in order for the MQTT feeds to become available.
¶ Confirming that data feeds are available in Home Assistant
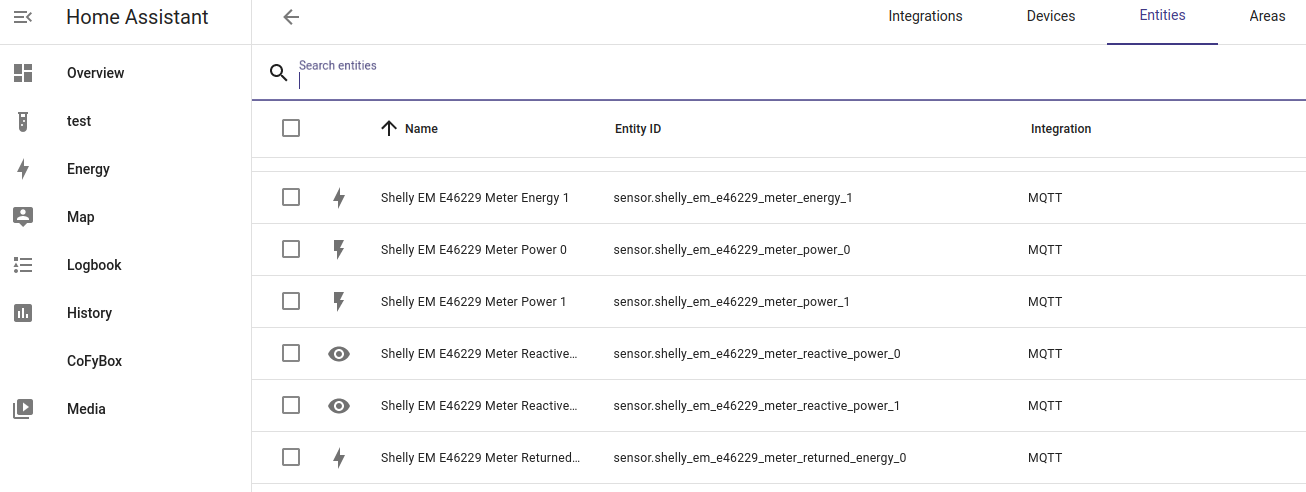
- Once restarted you can go and check that the feeds have appeared in your Home Assistant dashboard. You should see a number of new devices under MQTT on your ‘config/integrations’ screen and these new devices and entities in their respective tabs.
¶ Bluetooth provisioning using the Shelly app (Pending device availability)
This method is the easiest but works only on newer ‘Pro’ or ‘Plus’ device models which use the ESP32 chipset:
* Shelly Plus 1/1PM
* Shelly Pro 1/1PM/2/2PM/4
This method uses the Shelly smart phone app (available from the Google Play or iOS app stores) to auto-discover and connect to the device over Bluetooth and then use this connection to send the Wifi credentials. Another advantage of the Plus/Pro lines is that the device can simultaneously run a wifi client and a hotspot (presumably one running on 2.4 GHz and the other on 5GHz) which makes it easier to recommission the device if necessary. This process is shown in the sequence of screen captures below (using Android app):